Marketers spend a lot of time crafting marketing messages and deliberate over the copy, the target audience, and the optimal time to blast the messages. So why not build an application that automatically sets up a voice campaign with the desired copy? Then, with an API, it can be integrated with a CRM to manage customers and schedule campaigns.
So as the sample application for this article, we are going to demonstrate an API-based implementation for a Voice SMS Campaign Manager. It is a Node.JS server backend that exposes a few APIs for running a basic marketing campaign with voice SMS. Behind the scenes, it leverages the Octopush service to translate the marketing copy to a voice call and delivers that to every customer’s phone number in a contacts list.
System Architecture
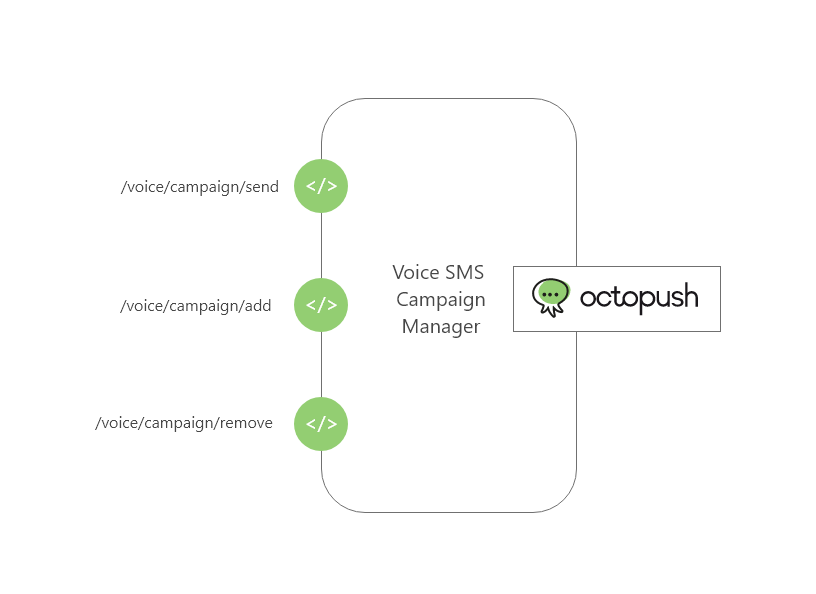
This Voice SMS Campaign Manager has three API endpoints.
- /voice/campaign/send: For sending a message to all customers in the contact list.
- /voice/campaign/add: For adding a new customer’s details, along with phone number, in the contact list.
- /voice/campaign/remove: Removing an existing customer’s phone number from the contact list.
Without further ado, let’s dive into the tutorial steps to build this application using Node.js.
Follow the tutorial steps below to set up your developer environment for Node.js and test this application.
Prerequisites
You can test and run the Voice SMS Campaign Manager from your local computer, as long as it is set up as per the requirements for the developer environment. Here are the tools you need to set up to test the application.
- Node.js: Setup a Node.js developer environment on your computer by downloading and installing the latest Node.js package from the official website.
- Postman: This is a tool to test APIs and is available as a desktop client from their official website. Make sure to download and install the application as per the instructions of your operating system.
In addition to that, you must also have an Octopush account with sufficient credits and the SMS and Voice SMS service enabled. You can sign up for the free Octopush.
Source Code Structure
The complete source code for the Voice SMS Campaign Manager sample application is available under our GitHub repository. Make sure to clone it within your development environment.
The main source code is voice-sms-campaign.js, a JavaScript file containing the business logic for all three API endpoints. Let’s do a quick walkthrough of this code.
At a global level, the code imports the express and the axios node modules. It also declares two constants API_KEY and API_LOGIN, to store the Octopush credentials. Additionally, it stores a config object containing the headers for triggering Octopush APIs. The express.js module opens up port 3000 for listening to API requests.
const express = require('express')
const app = express()
const axios = require('axios')

const API_KEY = '<YOUR_OCTOPUSH_API_KEY>'
const API_LOGIN = '<YOUR_OCTOPUSH_API_LOGIN>'

app.use(express.json())
app.listen(3000)

const config = {
  headers: {
    'Content-Type': 'application/json',
    'api-key': API_KEY,
    'api-login': API_LOGIN,
    'cache-control': 'cache-control'
  }
}
The API endpoint for sending voice campaigns /voice/campaign/send, wraps the Octopush API for sending SMS to a list as an axios post( ) call to send voice SMSs to a contact list. The API request body accepts the text message to be sent as a voice SMS. The contact list, in this case, is predefined as ‘voice_campaign_list’.
app.post('/voice/campaign/send', function (req, res) {
  const body = {
    list_name: 'voice_campaign_list',
    text: '',
    purpose: 'alert',
    sender: '12345',
    voice_gende: 'female',
    voice_language: 'en-GB'
  }
  body.text = req.body.text
  axios.post('https://api.octopush.com/v1/public/voice-campaign-on-list/create',
    body,
    config)
    .then(function (result) {
      res.setHeader('content-type', 'Application/json')
   res.statusCode = 200
      res.json({ response_desc: 'Success' })
    })
    .catch(function (error) {
      console.log(error)
      res.setHeader('content-type', 'Application/json')
      res.statusCode = error.response.status
      res.json({ response_desc: error.response.statusText })
    })
})
The API endpoint for adding a phone number to the list, /voice/campaign/add, wraps the Octopush Contact API for adding a contact. It accepts the phone number, first and last name of the contact to be added to the list ‘voice_campaign_list’.
app.post('/voice/campaign/add', function (req, res) {
  const body = {
    list_name: 'voice_campaign_list'
  }
  body.contacts = req.body.contacts
  axios.post('https://api.octopush.com/v1/public/contact/create',
    body,
    config)
    .then(function (result) {
      res.setHeader('content-type', 'Application/json')
      res.statusCode = 200
      res.json({ response_desc: 'Number Added' })
    })
    .catch(function (error) {
      console.log(error)
      res.setHeader('content-type', 'Application/json')
      res.statusCode = error.response.status
      res.json({ response_desc: error.response.statusText })
    })
})
The API endpoint for removing a phone number to the list, /voice/campaign/remove, wraps the Octopush Contact API for deleting a contact. It accepts an array of phone numbers to be deleted from the list ‘voice_campaign_list’.
app.post('/voice/campaign/remove', function (req, res) {
  const config_del = {
    headers: {
      'Content-Type': 'application/json',
      'api-key': '<YOUR_OCTOPUSH_API_KEY>',
      'api-login': '<YOUR_OCTOPUSH_API_LOGIN>',
      'cache-control': 'cache-control'
    }
  }

  config_del.data = {
    phone_numbers: req.body.phone_numbers,
    list_name: 'voice_campaign_list'
  }
  axios.delete('https://api.octopush.com/v1/public/contact/delete',
    config_del)
    .then(function () {
      res.setHeader('content-type', 'Application/json')
      res.statusCode = 200
      res.json({ response_desc: 'Number Removed' })
    })
    .catch(function (error) {
      console.log(error)
      res.setHeader('content-type', 'Application/json')
      res.statusCode = error.response.status
      res.json({ response_desc: error.response.statusText })
    })
})
Voice SMS Campaign Manager: Steps to Deploy and Test
Before deploying the application, ensure that you have activated the Vocal SMS service through the Octopush dashboard and have purchased credits under your account.
In case you need help, check out the first step (Step 1 – Configure your Octopush account) in part 1 of this article.
Step 1 – Integrate your Octopush API credentials into the code
Log in to your Octopush dashboard and access the API credentials page to see your API key.
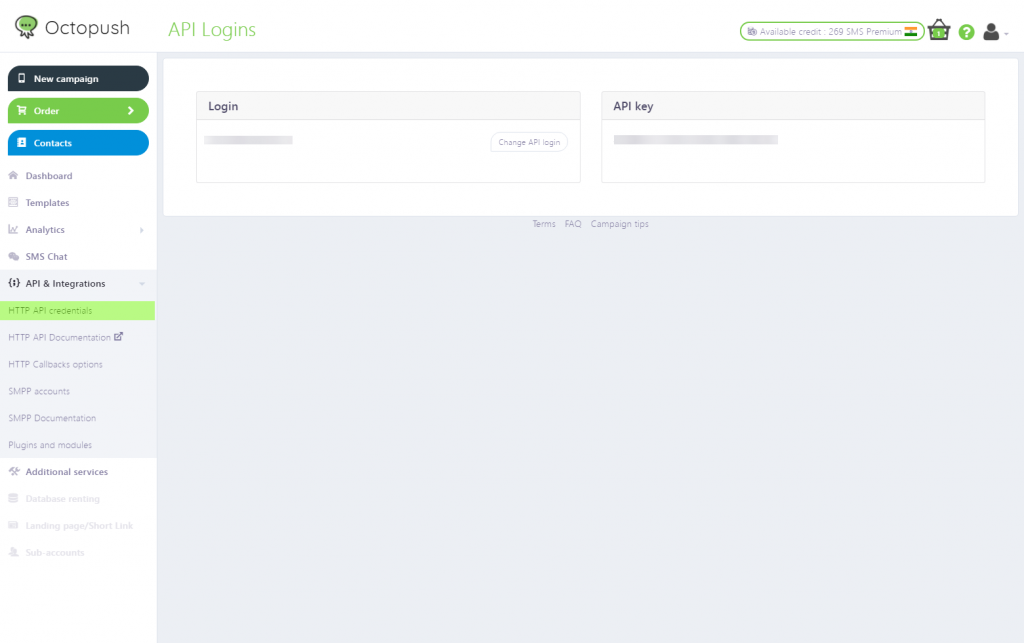
Open the source file voice-sms-campaign.js and replace all instances of the placeholders, <YOUR_OCTOPUSH_API_KEY> and <YOUR_OCTOPUSH_API_LOGIN> with the API key and Login string shown on the page.
Step 2 – Install and deploy the Voice SMS Campaign Manager
Open a command-line terminal and change the directory to the root of the cloned repository.
1. Install the Node.js dependencies for Voice SMS Campaign Manager
npm install
This will install the express and other dependencies needed to run the application.
2. Run the Voice SMS Campaign Manager
node voice-sms-campaign.js
With this command, the application is now deployed on localhost and is listening on port 3000.
Step 3 – Test the Voice SMS Campaign Manager
To test the application, launch the Postman desktop client and create a new HTTP request with the URL and body parameters as follows
.
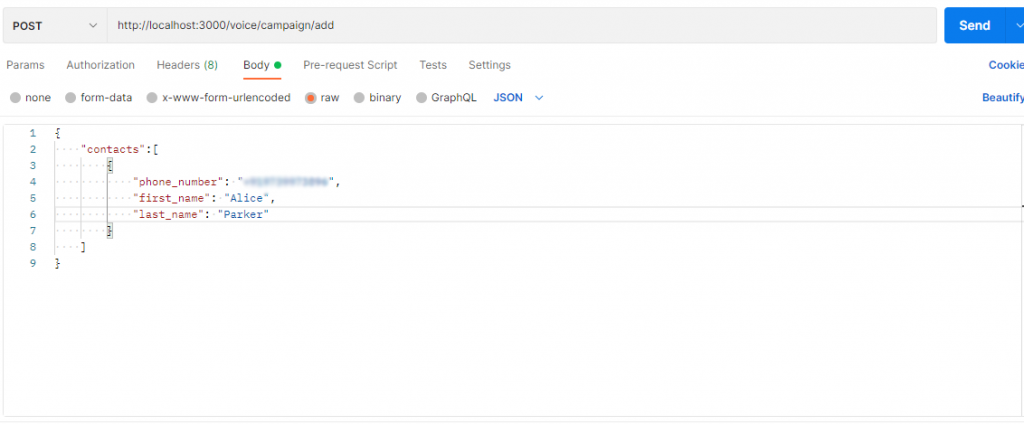
Trigger the /voice/campaign/add API, and you should see a successful response from the Voice SMS Campaign Manager.

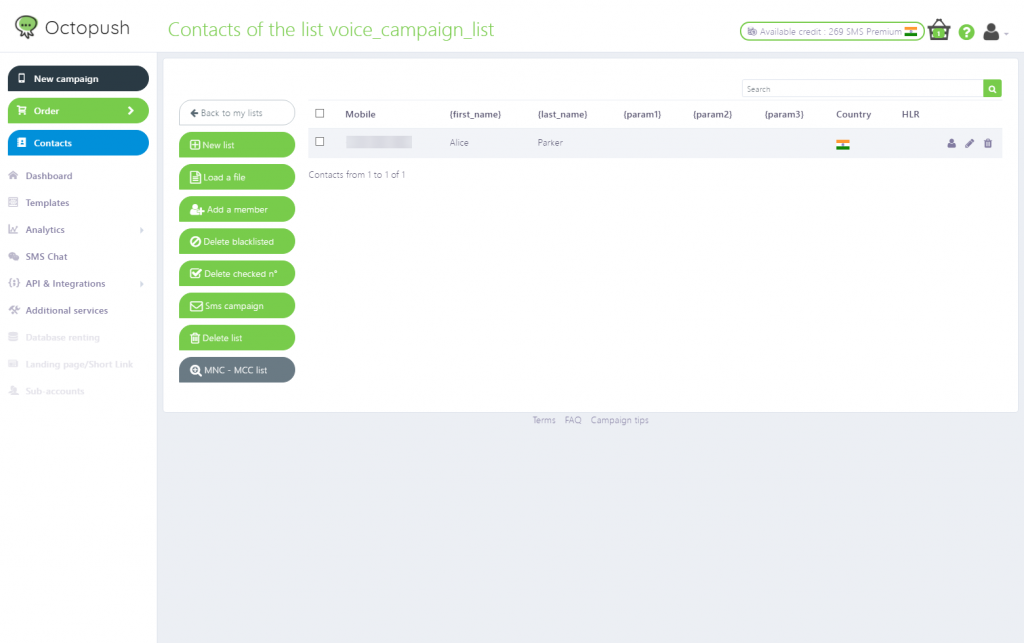
If you head over to your Octopush dashboard, you can see an entry for a customer named Alice Parker in the ‘voice_campaign_list’ with the same phone number you have added through the API.
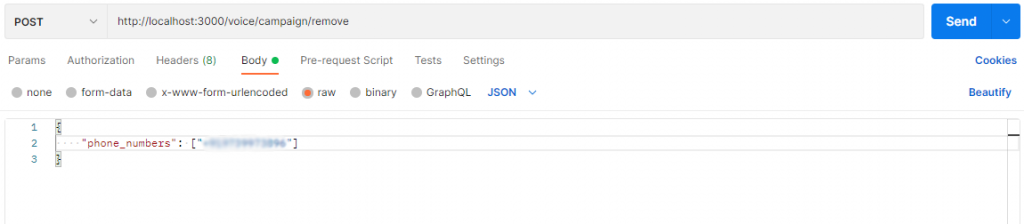
You can also remove this number from the campaign list using the /voice/campaign/remove endpoint. Trigger this API using Postman as shown below, and you should see the entry deleted from ‘voice_campaign_list’.
Trigger the /voice/campaign/add API again to add the entry in the ‘voice_campaign_list’. Now let’s create a voice campaign using the ‘/voice/campaign/send’.
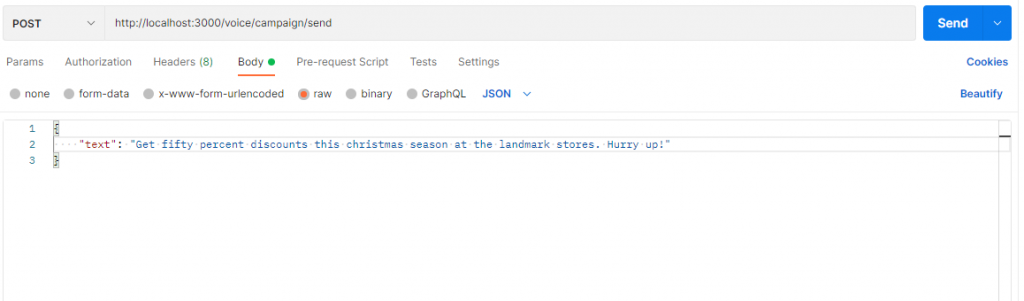
Upon triggering this API, a new campaign is set up on your Octopush dashboard.
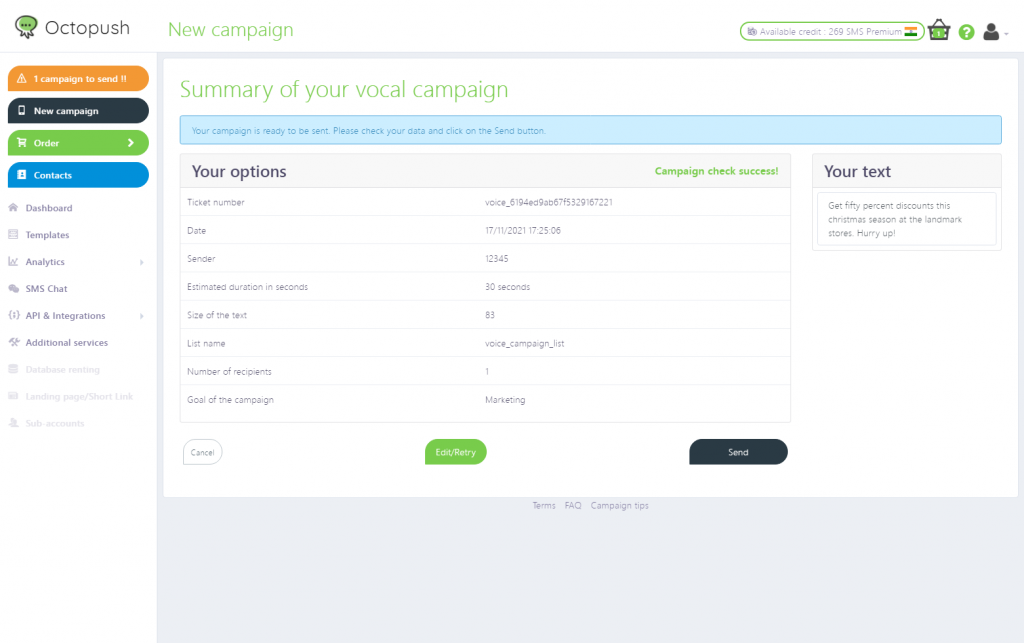
Clicking on the “Send” button will send the ‘text’ string of the API request body as a voice SMS to all the phone number entries in the ‘voice_campaign_list’ list.
You can add your phone number and then trigger this campaign again. You will get a call. Upon answering the call, you should hear a female voice speaking the exact text you defined in the API call for /voice/campaign/send.
The Way Forward
That’s it. Your Voice SMS Campaign Manager is now all set to broadcast your marketing messages to your customer base. In addition, you can host it on a public server to be integrated with your CRM software.
Check out the Octopush documentation for more options for sending SMS to a list. Instead of sending the campaign from the Octopush dashboard, you can also schedule it at a particular time. Additionally, to keep your contact list sane, you can leverage the HLR lookup API to filter out invalid numbers periodically.
We can’t wait to see what unique applications you are building with Octopush. So please share your experiences of working with our APIs in the comments. And if you haven’t done it yet, sign up for your free Octopush account and get started with your SMS campaigns right away.