Author Name: Idowu Oselumhe Ilekura
As a software engineer, you might want to send welcome messages to your newly registered users, or send reminders to pay for services rendered. Or, you may want to outsource this by hiring someone to send the messages or reminders, but you know this would lead to unnecessary expenses.
Instead of hiring someone, you can use your Python knowledge coupled with Octopush SMS API to automate sending messages or reminders. Octopush SMS API can send and schedule text messages as well as check phone validity.
In this tutorial, you’ll learn how to send, schedule, and set up replies for text messages using Octopush API and Python.
What Is Octopush API?
Octopush API is an application programming interface built by Octopush that allows software engineers to perform and automate communication with applications, software, and information systems.
Octopush API can perform the following communication functionality:
- Sending text messages: With Octopush API, software engineers can send SMS texts to users of their application or their company’s purpose.
- Scheduling text messages: Octopush API offers the functionality to schedule a text message to send at a particular date and time.
- Checking phone number validity: You can quickly validate phone numbers with Octopush API; this is important when users of your application drop invalid numbers. You can use the API to validate the existence of any number.
- Sending voice SMS: If users don’t want to read your text messages, you can transform them to voice messages and send those instead. Using voice messages can increase your open rate and help more users interact with the content of your message.
Implementing SMS Messages Using Python
Before you can begin sending and automating SMS messages with Octopush, you need to install the Octopush Python modules, set up a config file, check your available credit balance, and send a test SMS.
Install Octopush Python Modules
To install Octopush, open up your terminal on Mac or Linux. If you’re using Windows, open the command prompt. You can install the Octopush Python module through the popular pip install PyPI method:
pip install octopush
If you wish to use pip3 instead of pip to install, you can open up your command prompt or terminal and type:
pip3 install octopush
Alternatively, you can use the requirements.txt PyPI approach and type Octopush inside your requirements.txt file. Then use the command below in your terminal or command prompt:
# use pip3 if you don’t have pip
pip install -r requirements.txt
You can also build Octopush from source code by using the following commands:
git clone https://github.com/octopush/octopush-sms-python
cd octopush-sms-python
# use sudo python3 or python if you have linux
python setup.py install
Set Up a Config File
As a best practice, you need to separate the codes you use to set up connections from your main code. This will help make your code flexible, easy to modify, and modular.
To set up your config file, you need to register on Octopush to obtain your user login and API key.
Register on the Octopush Website
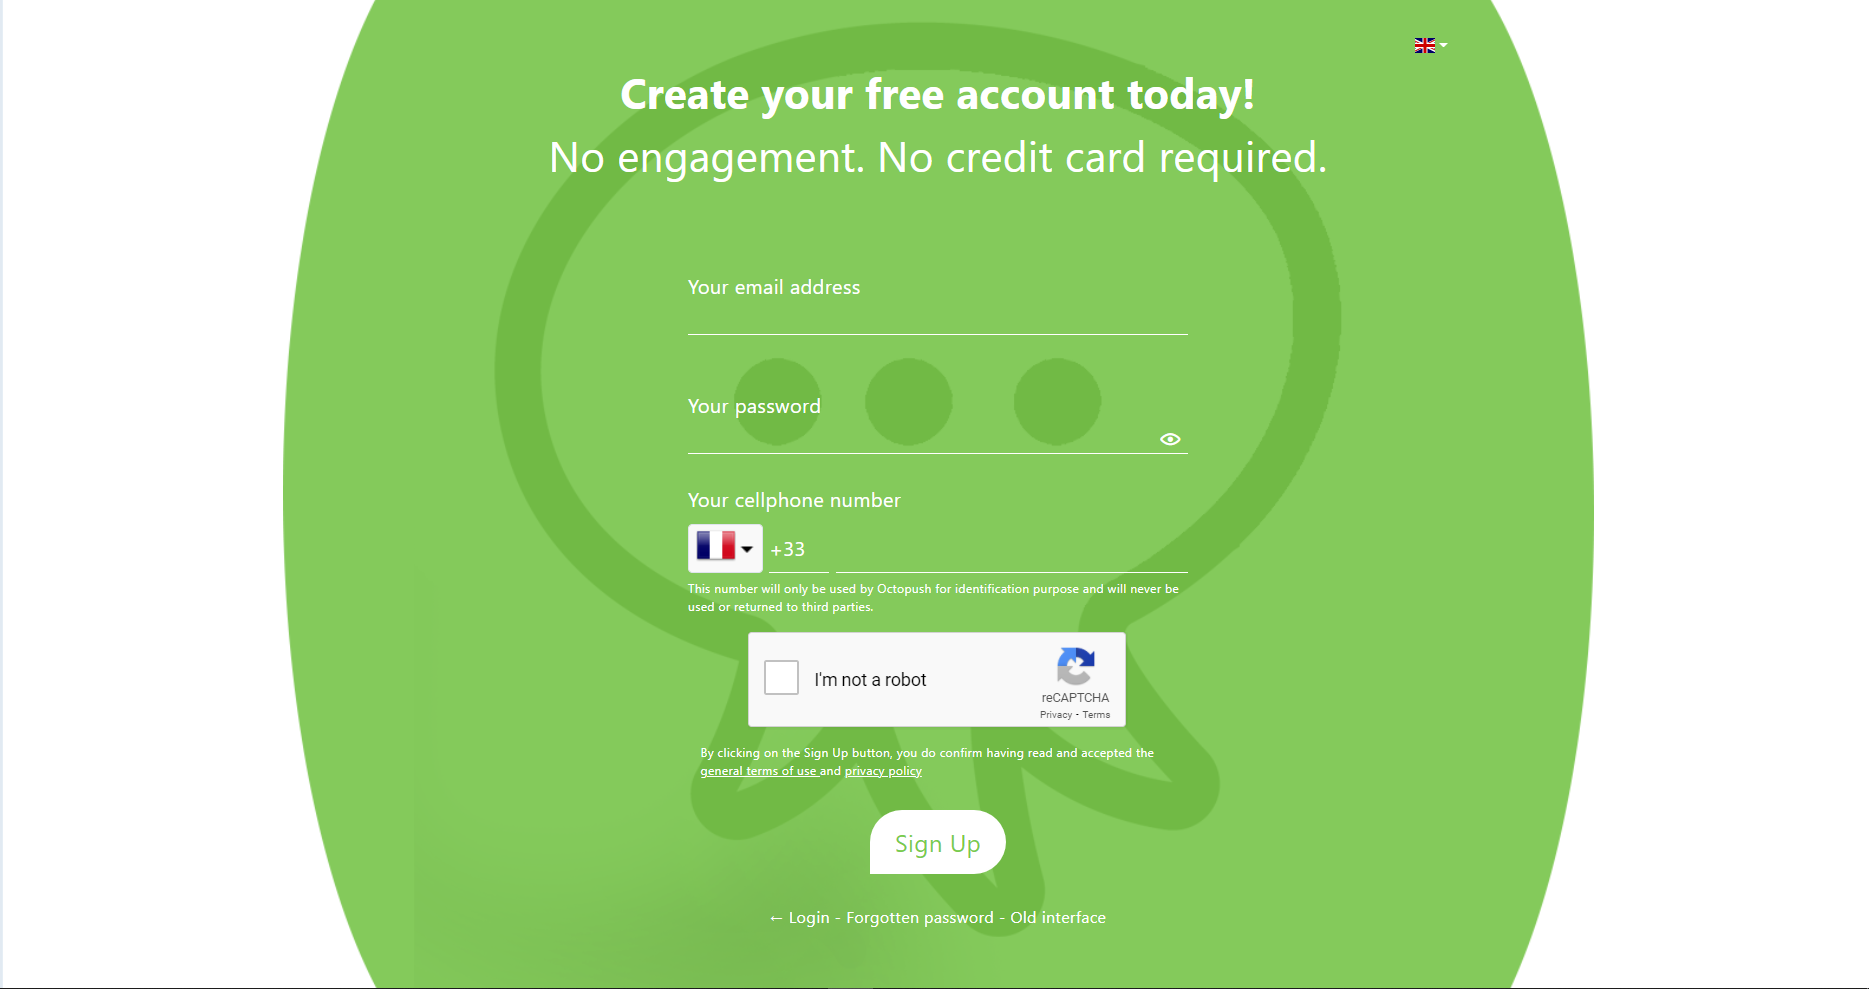
To register, navigate to the Octopush website and click the Sign Up Free button.
Now you should be able to fill in your email address, password, and cellphone number. Verify you’re not a robot and click Sign Up.
After signing up, you need to confirm your email address and validate your registration.
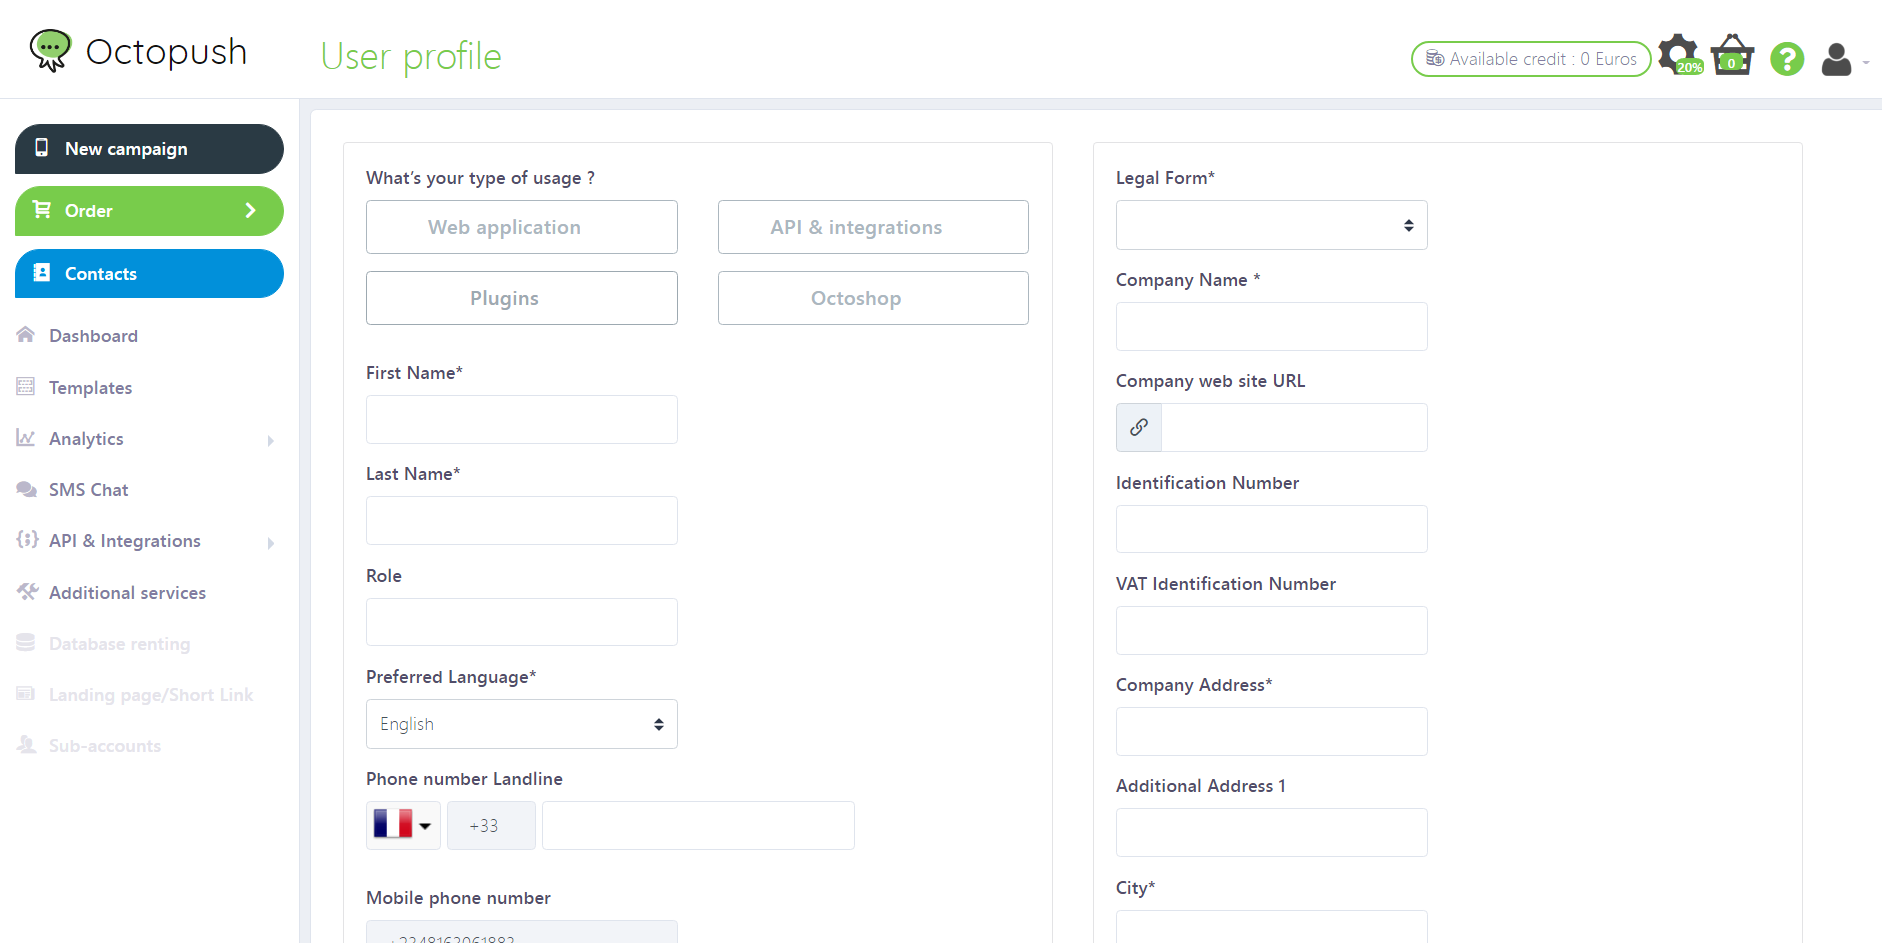
Click the Complete this step button. You should see a user profile page where you can choose the category you plan on using. You only need to fill out the fields marked with asterisks because those are considered essential fields. Finally, click Submit.
Now, proceed to step three and click the Complete this step button again. Certify that you are the owner, and select Validate.
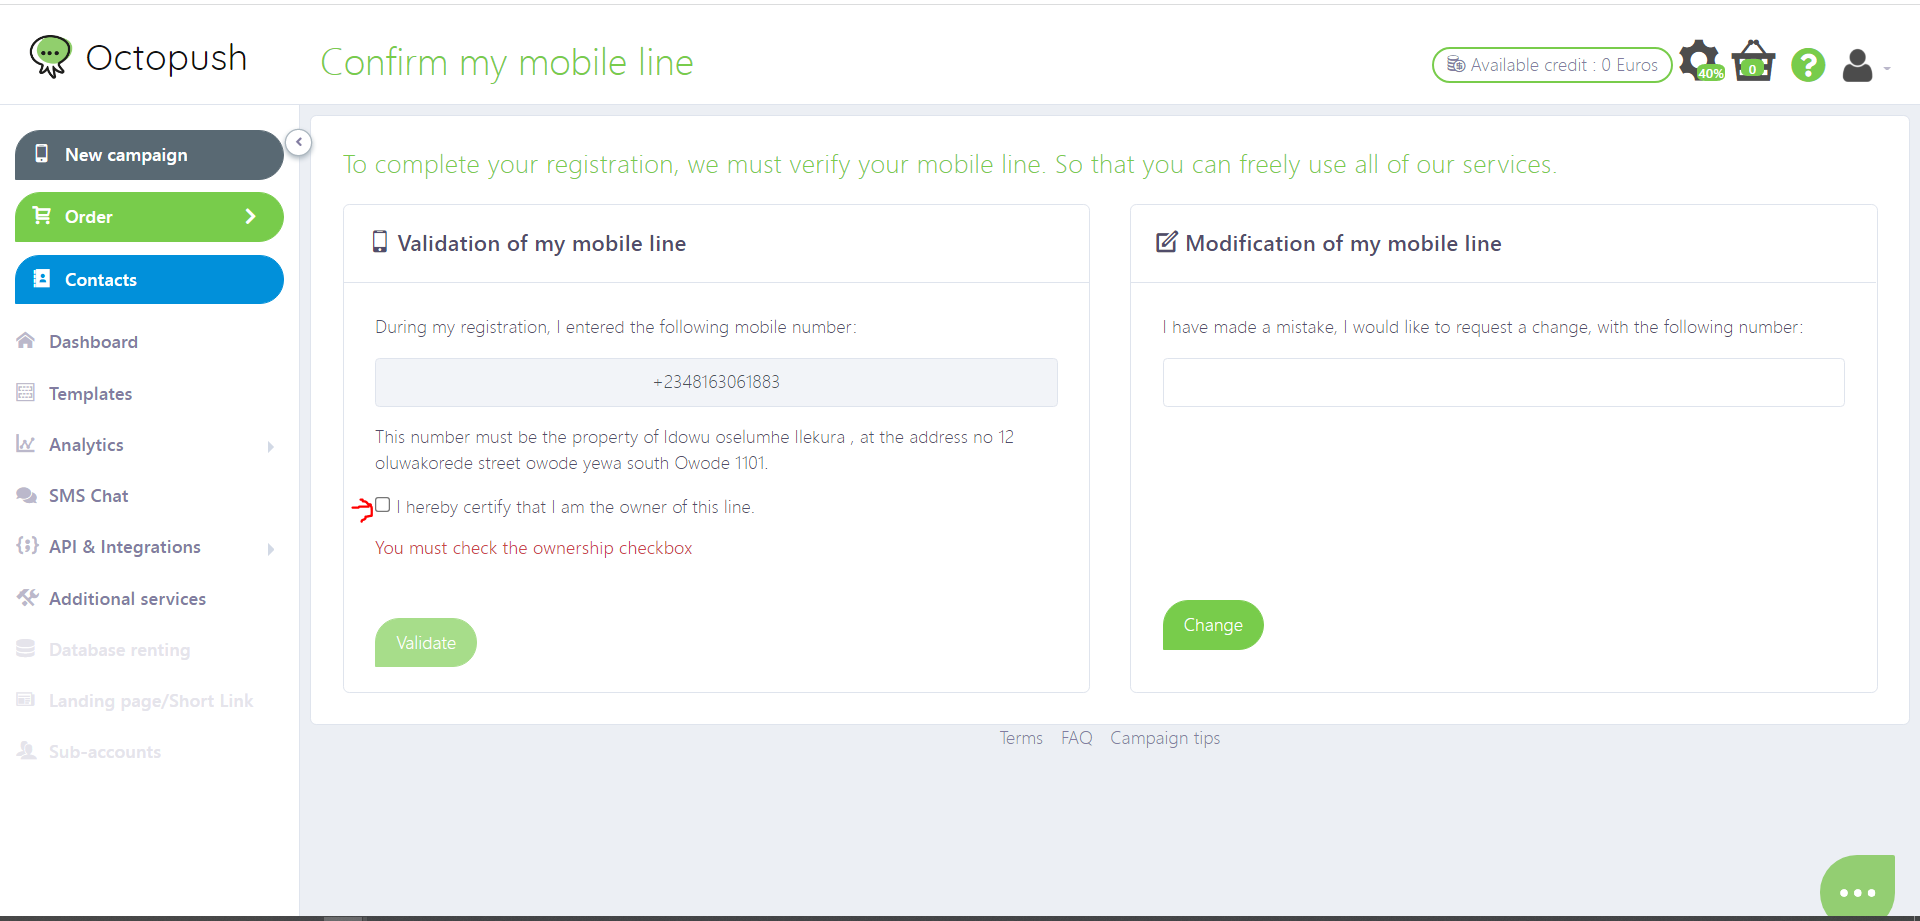
Once you validate, you need to check your SMS messages on your phone, copy the code, and input the code in the text box. Once you are done inputting the text, select Validate again.
You can now customize your service preference, but in this tutorial you’re going to opt to complete this step later by selecting Later.
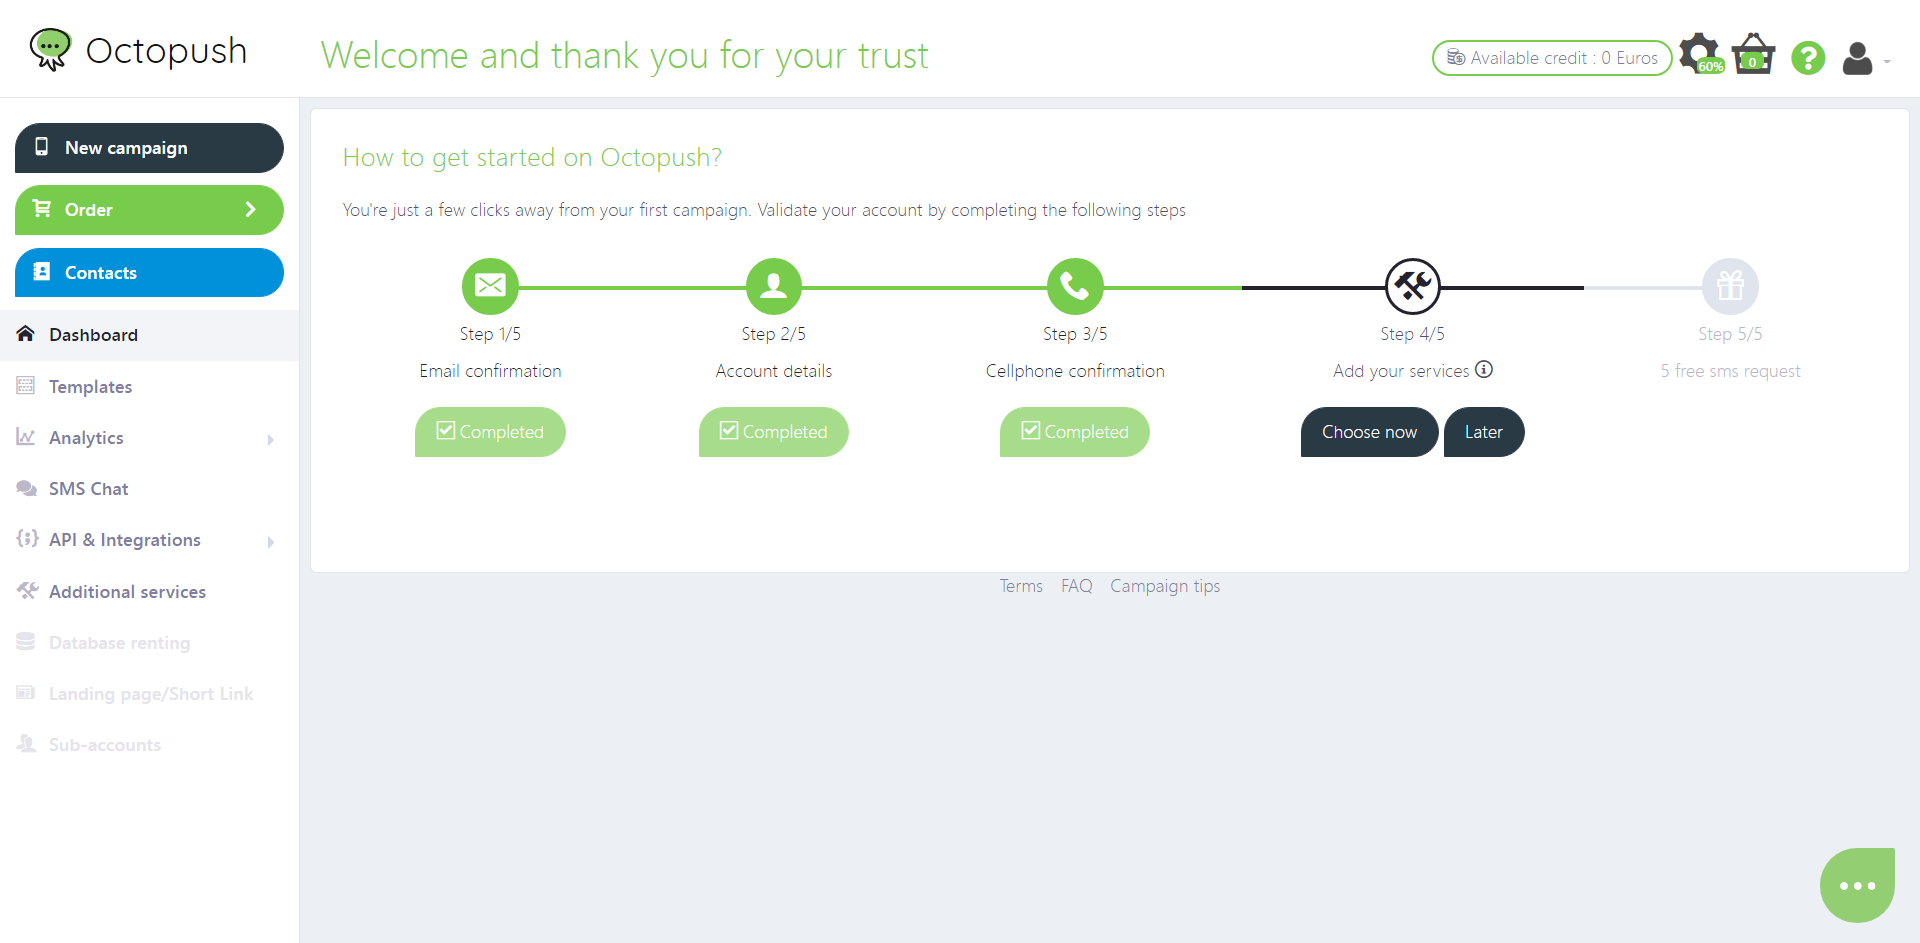
Now you need to request five free SMS as the final step of the process. You can only use these free SMS to test Octopush. After you’ve requested your free SMS, you’ll be taken to a welcome page with a message saying that a manager will process your request.
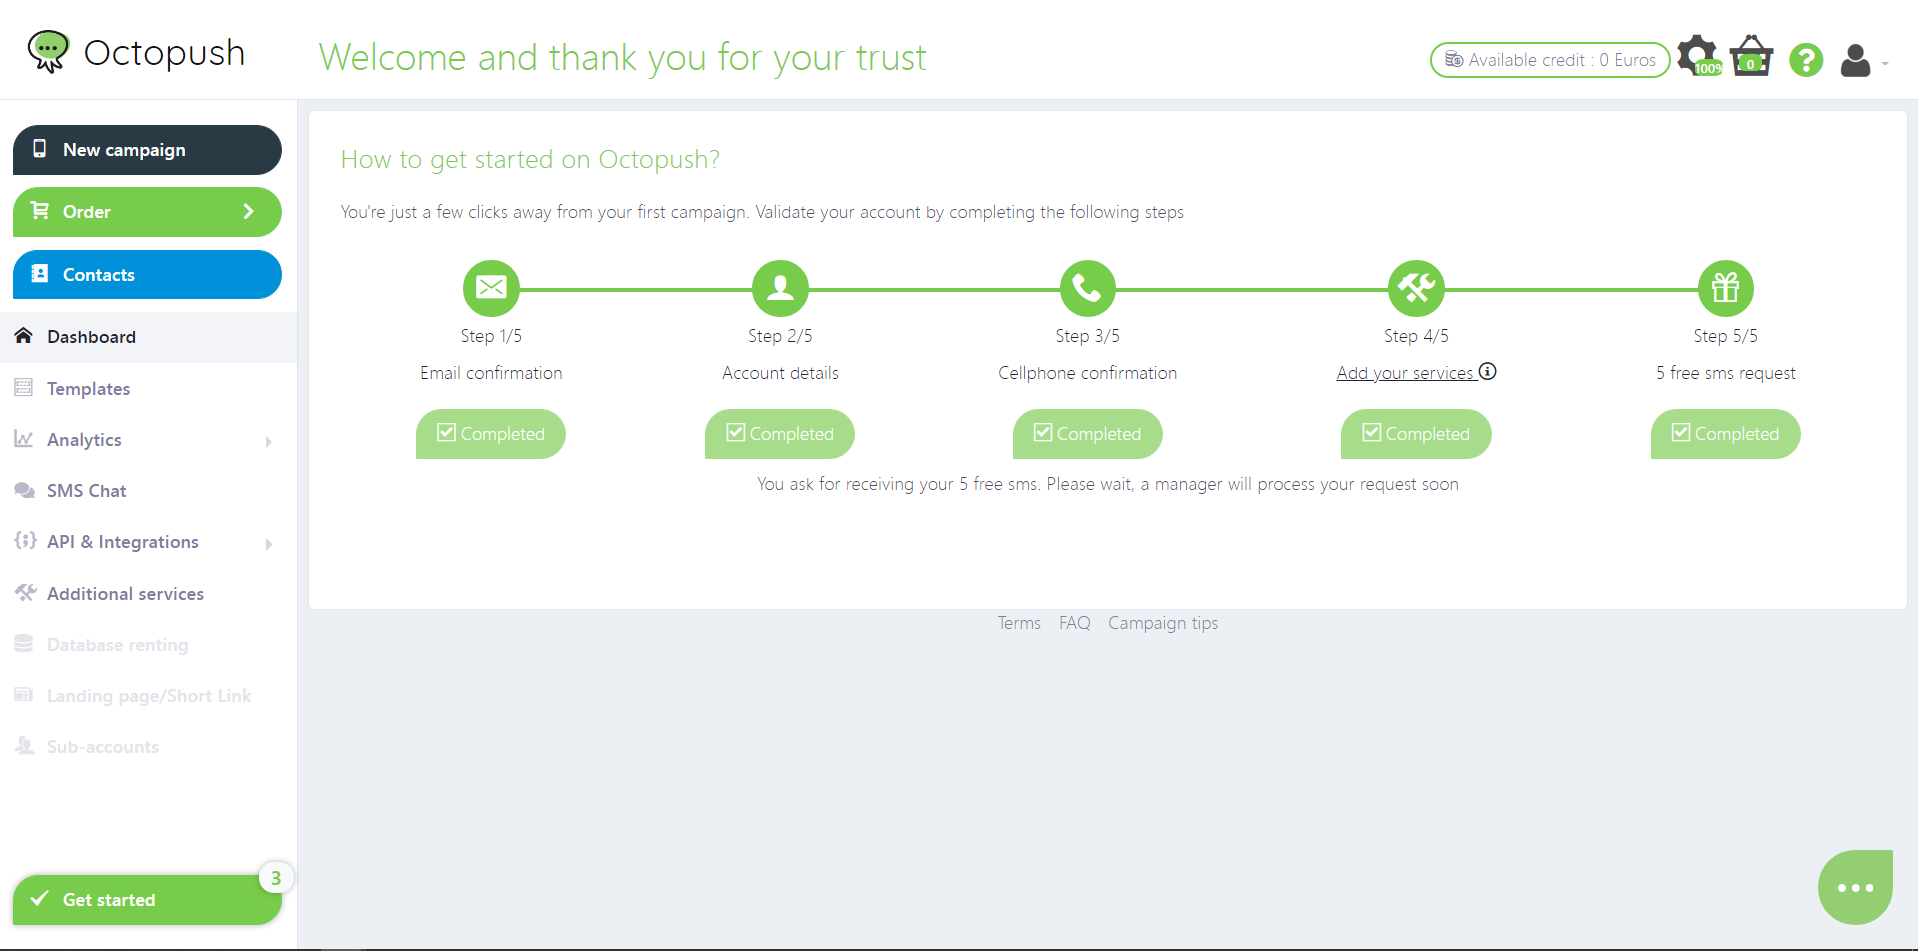
Once your request has been processed, which can take about three working days, your available credit will change from zero to 0.5 and you can now start sending SMS.
Retrieve Your User Login and API Key
To access your user login and API key, you’ll need to click API & Integrations > HTTP API credentials in the sidebar to retrieve your user login and key. Once you have these, you’re ready to set up your config file.

Open up any editor of your choice. This tutorial uses Visual Studio Code.
Create a config.py file and copy the content below, making sure to change the user_login and api_key to your information:
import octopush
config = {
'user_login': '*******@*******',
'api_key': '****************',
'sms_type': octopush.SMS_WORLD
}
This specifies your user_login, api_key, and the SMS type. Several types of SMS can be sent with Octopush, including simulation, real, standard, premium, and world. You’ll need to specify the type you intend to use when you’re sending a message.
You can see the different SMS types by running the code below and pressing Enter on your keyboard:
import octopush
help(octopush)
After pressing Enter repeatedly, you should see something similar to the code below:
REEL = 'real'
SIMULATION = 'simu'
SMS_PREMIUM = 'FR'
SMS_STANDARD = 'XXX'
SMS_WORLD = 'WWW'
There are several attributes of the Octopush modules that help to store the different SMS types to be sent. The octopush.REEL attribute is used to store the SMS real type. Instead of typing sms_type = 'real', you can just type sms_type = octopush.REEL. If you want to send an SMS of type WWW (world wide web), you can use octopush.SMS_WORLD.
Check Your Available Credit
After setting up your config file, it’s important to check the available balance on your account to ensure your message isn’t delayed due to low credit.
To check your available balance, you can use the code below to print the type and balance of each SMS that can be sent:
import octopush
# importing the SMS module from octopush module
from octopush import SMS
# import config dictionary from config module
from config import config
#instantiating the SMS class with the user_login and api_key parameters
sms = SMS(config['user_login'], config['api_key'])
# get all sms type balance
sms_balance = sms.get_balance()
for balance in sms_balance.findall('balance'):
# get the type of the credit and the credit value
print(balance.attrib['type'], balance.text)
Once you’ve run the script, you’ll see the output below, which shows the balance for each SMS type. FR is a code for premium SMS, and XXX is a code for standard SMS. The account holder here has five premium and five standard SMS:
FR 5
XXX 5
Sending an SMS
To send an SMS with Octopush API, you’ll need:
- the text you would like to send
- the recipient number, which must be written with the country code (eg
+234xxxxxxx) - the type of SMS
- the sender’s name, which will be displayed in the recipient message inbox header
- a uniquely generated number from the UUID Python module, which will serve as the
request_idof the SMS that is sent
According to GeeksforGeeks, UUID (Universal Unique Identifier) is a Python library that helps in generating random objects of 128 bits as ID’s. It provides a unique ID based on time and computer hardware. There are several ways of generating a UUID, including using the
uuid1function that utilizes the host ID, sequence number, and the current time to generate it. If you want to generate a random UUID, you can use theuuid4function. You can visit the official Python documentation to learn more.
Now that you know the requirements for sending an SMS, you can dive deeper into sending SMS messages. The code below will import an Octopush module, import the SMS class from the Octopush module, and import the config dictionary from the config module. Then it will import the UUID module to generate the UUID number and instantiate the SMS class with your login and API keys. The code will also set the SMS text (the message), type (the premium SMS type will be used in this scenario), and recipient number. If you have more than one recipient, each number must be separated with a comma. It also sets the SMS sender and the request_id with the uuid1 function and sends the message.
import octopush
from octopush import SMS
from config import config
import uuid
message = 'Hello, welcome to Octopush'
recipient =['+2349017541212']
sender = 'Idowu'
sms = SMS(config['user_login'], config['api_key'])
sms.set_sms_text(message)
sms.set_sms_recipients(recipient)
sms.set_sms_type(octopush.SMS_PREMIUM)
sms.set_sms_sender(sender)
sms.set_sms_request_id(str(uuid.uuid1))
sent_result = sms.send()
print(sent_result)
To use the code above, copy it, save it inside a Python script with the name octopush_sms.py, and run it.
After running the script, your message will be sent, and you’ll see <Element 'octopush' at 0x0000025DC33CC0E0> in your terminal. This confirms that your SMS has been sent.
How to Schedule SMS Messages with Octopush SMS API
If you want to send your message on a particular day and time, you’ll need to set this in your code.
The code below will do all of the actions mentioned above, as well as set the date and time that your message will be delivered. The set_date method accepts the year, month, day, hour, and second as first, second, third, fourth, and fifth arguments respectively.
While scheduling messages, ensure you specify the sms_mode. octopush.INSTANTANE means the message will be delivered instantly. octopush.DIFFERE requires that you set the date and time that the SMS will be delivered.
import octopush
from octopush import SMS
from config import config
import uuid
message = 'Merry Christmas from Octopush'
recipient =['+2348163061883']
sender = 'Octopush'
sms = SMS(config['user_login'], config['api_key'])
sms.set_sms_text(message)
sms.set_sms_recipients(recipient)
sms.set_sms_type(octopush.SMS_PREMIUM)
sms.set_sms_sender(sender)
sms.set_sms_request_id(str(uuid.uuid1))
sms.set_date(2021,12,25,0,1)
sms.set_sms_mode(octopush.DIFFERE)
sent_result = sms.send()
print(sent_result)
Copy the code above, save it inside a Python script with octopush_sms_schedule.py, and run the code. After running your code, your message will be sent to your recipient, and you will see something similar to this in your terminal:
<Element 'octopush' at 0x0000025DC33CC0E0>
This confirms that your SMS has been sent and will be delivered on the specified date and time.
How to Set Up Replies
In some instances, you’ll want to receive feedback from users via an SMS message. You’ll need to use the set_option_with_replies method of the Octopush SMS class to set this up. The set_option_with_replies will notify Octopush that you want to receive replies to the message that you’ve sent.
The code below will do all of the actions mentioned in the above examples and sets the option to receive a response:
import octopush
from octopush import SMS
from config import config
import uuid
message = 'Do you wish to subscribe to our premium service? nReply with either Yes or No'
recipient =['+2348163061883']
sender = 'Octopush'
sms = SMS(config['user_login'], config['api_key'])
sms.set_sms_text(message)
sms.set_sms_recipients(recipient)
sms.set_sms_type(octopush.SMS_PREMIUM)
sms.set_sms_sender(sender)
sms.set_sms_request_id(str(uuid.uuid1))
# set the option to receive a response
sms.set_option_with_replies(1)
sent_result = sms.send()
print(sent_result)
To use this code, copy it, save it inside a Python script with the name octopush_sms_withreplies.py, and run the code. After running your code, your message will be sent to your recipient, and you’ll see something similar to this in your terminal:
<Element 'octopush' at 0x0000025DC33CC0E0>
This confirms that your SMS has been sent and the recipient can respond to it.
Conclusion
In this article, you’ve learned about the importance of sending SMS and how to use Octopush SMS API to send text messages in Python. Octopush SMS API can help you easily send and schedule messages as well as receive replies. Before sending your first message, don’t forget to check your balance and save your connection parameters in a config file.
There are additional functionalities you can perform with Octopush, including verifying your database, avoiding failed SMS, and creating landing pages for text messages. You can learn more on Octopush’s website.